
Bare-Metal K8s Cluster with Raspberry Pi – Part 1
There are multiple ways we can use a Kubernetes cluster to deploy our applications. Most of us opt to use any Kubernetes service from a public cloud provider. GKE, EKS, AKS are the most prominent ones. Deploying a Kubernetes cluster on a public cloud provider is relatively easy, but what if you want a private bare-metal K8s cluster. Being worked extensively in the data center and started my career as a Sys Admin, I personally prefer a piece of tangible hardware to get the feel of building it. This blog post walk you through the steps I took in order to have a bare-metal K8s cluster to play with.
K8s is an open source container orchestration platform that helps manage distributed, containerized applications at a massive scale. Born at Google as Borg, version 1.0 was released in July 2015. It has continued to evolve and mature and is now offered as a PaaS service by all of the major cloud vendors.
Google has been running containerized workloads in production for more than a decade. Whether it’s service jobs like web front-ends and stateful servers, infrastructure systems like Bigtable and Spanner, or batch frameworks like MapReduce and Millwheel, virtually everything at Google runs as a container.
You can find the paper here.
Kubernetes traces its lineage directly from Borg. Many of the developers at Google working on Kubernetes were formerly developers on the Borg project. We’ve incorporated the best ideas from Borg in Kubernetes, and have tried to address some pain points that users identified with Borg over the years.
More than just enabling a containerized application to scale, Kubernetes has release-management features that enable updates with near-zero downtime, version rollback, and clusters that can ‘self-heal’ when there is a problem. Load balancing, auto-scaling and SSL can easily be implemented. Helm, a plugin for Kubernetes, has revolutionized the world of server management by making multi-node data stores like Redis and MongoDB incredibly easy to deploy. Kubernetes enables you to have the flexibility to move your workload where it is best suited. This compliments the hybrid cloud story and in my career it has become more apparent that my customers see this as well to help them resolve issues like; cost, availability and compliance. In parallel software vendors are starting to embrace containers as a standard deployment model leading to a recent increase in requests for container solutions.
As you can see in the workflow comparison below, there is greater room for error when deploying on-premises. Public clouds provide the automation and reduces the risk of error as less steps are required. But as mentioned above, private cloud provides you more options when you have unique requirements.
Pros:
- Using Kubernetes and its huge ecosystem can improve your productivity
- Kubernetes and a cloud-native tech stack attracts talent
- Kubernetes is a future proof solution
- Kubernetes helps to make your application run more stable
- Kubernetes can be cheaper than its alternatives
Cons:
- Kubernetes can be an overkill for simple applications
- Kubernetes is very complex and can reduce productivity
- The transition to Kubernetes can be cumbersome
- Kubernetes can be more expensive than its alternatives
Pre-requisites:
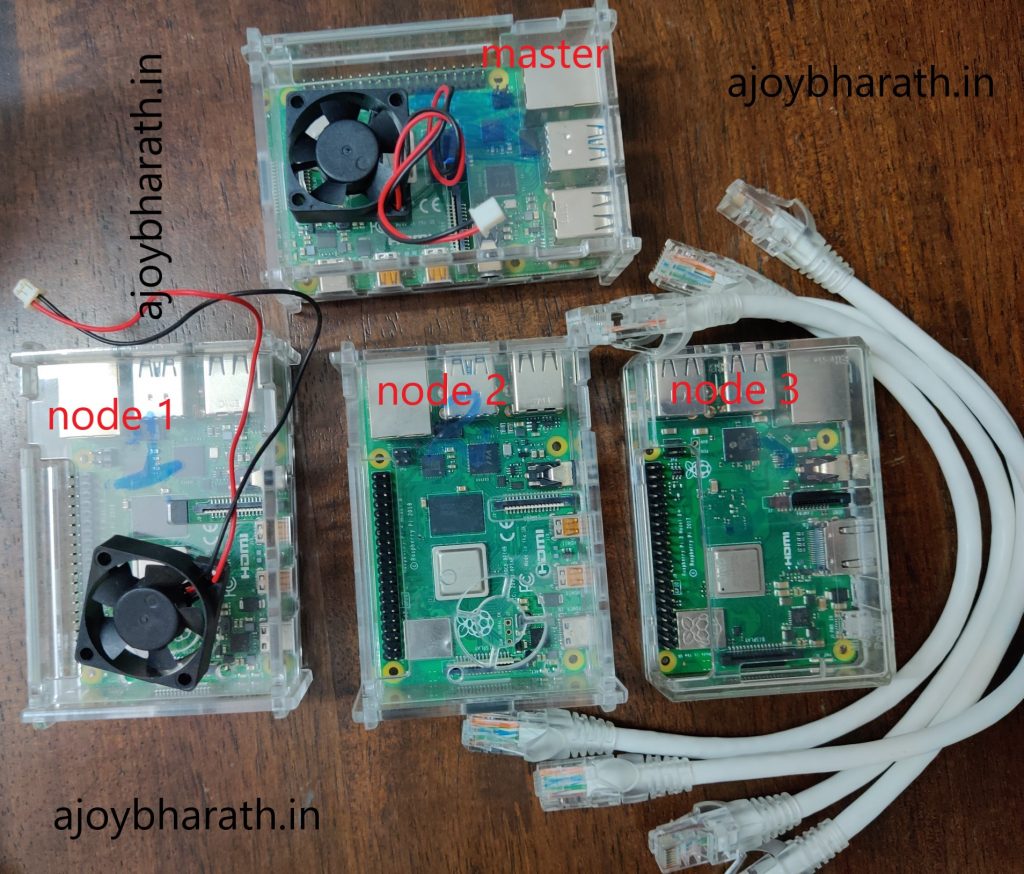
Compute:
3 x Raspberry Pi 4 Model B with 2 GB RAM
1 x Raspberry Pi 3 Model B+ with 1 GB RAM
Storage:
4 x 16GB High Speed Sand-disk Micro-SD Cards
Network:
1 x Network Switch – for local LAN for k8s internal connectivity
1 x Network Router – for Wifi (My default ISP router was used here) only master node had internet connectivity once completed the setup
4 x Ethernet Cables
1 x Keyboard, HDMI, Mouse (for initial setup only)
Initial Raspberry Pi Configuration:
Flash Raspbian to the Micro-SD Cards
Download image from the below link,
I have used BalenaEtcher to flash image onto micro-SD card
Perform Initial Setup on Boot on startup screen, we need to connect keyboard, monitor and mouse for this setup.
Choose Country, Language, Timezone
Define new password for user ‘pi’
Connect to WiFi or skip if using ethernet
Skip update software (We will perform this activity manually later).
Choose restart later
Configure Additional Settings Click the Raspberry Pi icon (top left of screen) > Preferences > Raspberry Pi Configuration
System
Configure Hostname
Boot: To CLI
Interfaces
SSH: Enable
Choose restart later
Configure Static Network Perform one of the following:
Define Static IP on Raspberry Pi: Right Click the arrow logo top right of screen and select ‘Wireless & Wired Network Settings’
Define Static IP on DHCP Server: Configure your DHCP server to define a static IP on the Raspberry Pi Mac Address.
Reboot and Test SSH
Username: pi
Password: Defined in step 2 above
From the terminal ssh pi@[IP Address]
Repeat steps for all of the Raspberry Pis.
Kubernetes Cluster Preparation with SSH connection to the Pi from your terminal. I am using a 12 years old Lenovo laptop running MX Linux. Open a terminal and establish ssh connection to the Pi

Perform Updates
apt-get update: Updates the package indexes
apt-get upgrade: Performs the upgrades
Configure Net.IP4.IP configuration Edit sudo vi /etc/sysctl.conf, uncomment net.ipv4.ip_forward = 1 and add net.ipv4.ip_nonlocal_bind=1.
Note: This is required to allow for traffic forwarding, for example Node Ports from containers to/from non-cluster devices.
Install Docker
curl -sSL get.docker.com | sh
Grant privilege for user pi to execute docker commands
sudo usermod pi -aG docker
Disable Swap
sudo systemctl disable dphys-swapfile.service
sudo reboot
We can verify this with the top command, on the top left corner next to MiB Swap should be 0.0.
As we completed the initial steps to create our K8s bare-metal cluster, we can see how we build the cluster in Part 2 of this blog post
Leave a Reply